Seam Allowance: What It Is and How to Sew It Accurately (2026)
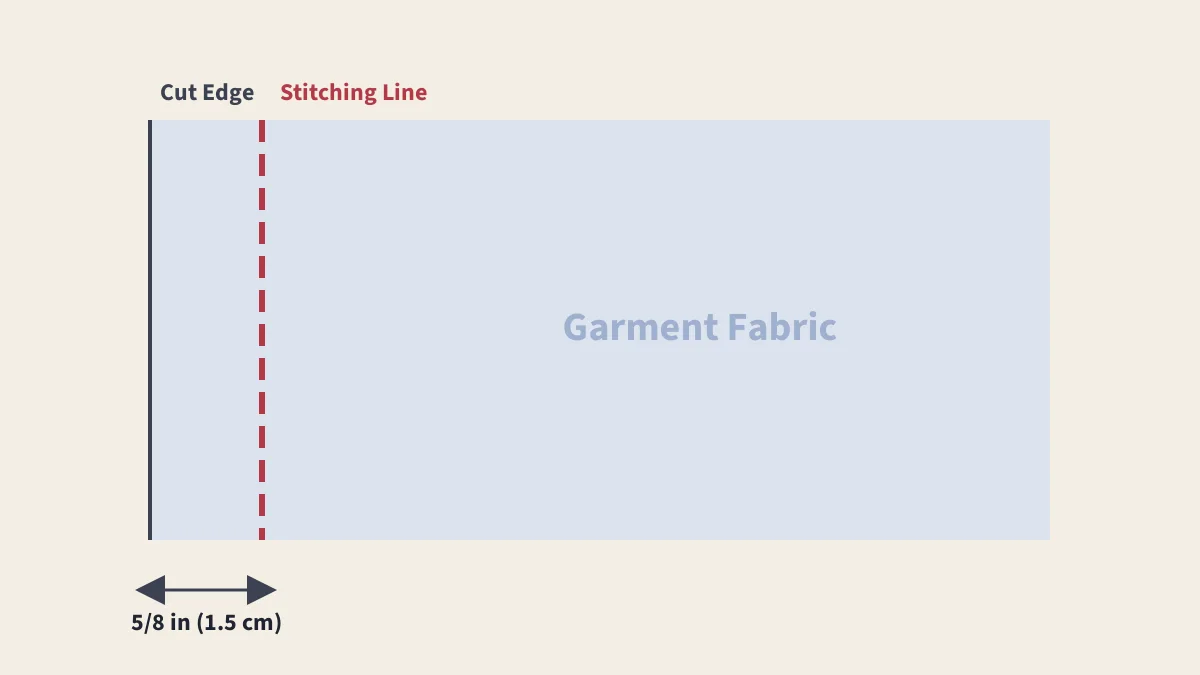
The seam allowance is the strip of fabric between the cut edge and the stitching line. Get it right and pieces fit together exactly as the pattern intends; get it wrong by even a little and garments and quilt blocks come out the wrong size.
In This Article
Common Seam Allowances
- 5/8 inch (1.5 cm): many traditional commercial garment patterns
- 1/2 inch (1.3 cm): many home décor and bag patterns
- 3/8 inch (1 cm): many European and independent patterns
- 1/4 inch (6 mm): quilting and patchwork
- Always: check what your pattern uses
Every seam starts with two edges and a decision about how far in to stitch. That distance, from the cut edge of the fabric to the line of stitching, is the seam allowance, often abbreviated SA on patterns. Patterns are drafted so that pieces fit together exactly when sewn with the stated allowance, which is why sewing it consistently matters as much as cutting accurately.
Why Seam Allowances Differ
There is no single universal seam allowance. Each pattern designer chooses one to suit the type of project, and the allowance is printed in the instructions.
| Allowance | Metric | Typical Use | Why |
|---|---|---|---|
| 1 inch or more | 2.5 cm+ | Fitting seams in tailoring, center back seams of trousers | Leaves room to let out the garment later |
| 5/8 inch | 1.5 cm | Many traditional commercial garment patterns | Room for fitting adjustments and seam finishes |
| 1/2 inch | 1.3 cm | Home décor, bags, some garments | A balance of strength and less trimming |
| 3/8 inch | 1 cm | Many European and independent patterns; knits sewn on a serger | Less bulk and less trimming; matches serger widths |
| 1/4 inch | 6 mm | Quilting and patchwork; collars and facings after trimming | Minimizes bulk; patchwork is pressed flat and quilted |
Why Accuracy Matters
A small error repeats across every seam. Sew a 5/8 inch seam at 3/4 inch on both side seams of a skirt and you lose half an inch of width at the waist and hips. In quilting, a block may have a dozen seams; an error of a sixteenth of an inch on each can leave a block noticeably too small, so rows no longer line up. That is why quilters care so much about a "scant" quarter inch, a seam just a thread or two narrower than 1/4 inch, which allows for the fabric taken up by the fold when the seam is pressed.
How to Sew an Accurate Seam Allowance
- Use the needle plate guides. Most machines have engraved lines on the needle plate marked in inches, millimeters or both, measured from the needle.
- Add a seam guide. A magnetic seam guide, an adhesive guide or a strip of masking tape placed at the right distance gives a physical edge to follow. Check that a magnetic guide is safe for your machine; some computerized machines advise against magnets.
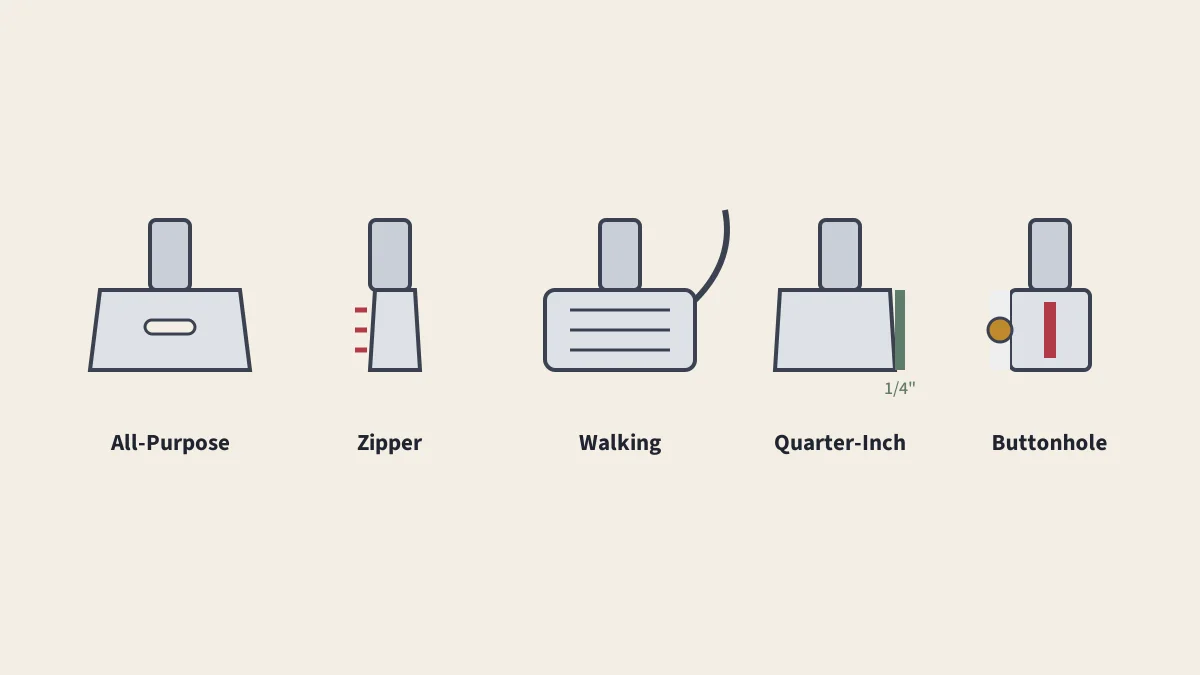
- Use a guide foot. A quarter-inch foot sits exactly 1/4 inch from the needle; an edge-stitch foot has a center blade. See the presser feet guide.
- Move the needle position on machines that allow it, so a foot's edge lines up with the allowance you need.
- Watch the guide, not the needle. Keep the cut edge running along the guide; the stitching will follow.
- Test it. Sew a seam on scraps, then measure from the edge to the stitching with a ruler.
Marking Seam Allowances
For curves, corners and tricky points, marking the actual stitching line helps. Use chalk, a washable marker or a tracing wheel, or mark key points such as corners and dots from the pattern. When a pattern does not include seam allowance, some sewists trace the stitching line onto the fabric and cut a measured distance outside it, which makes fitting changes easy to see.
Trimming, Grading and Clipping
After stitching, seam allowances are often reduced to cut bulk:
- Trimming: cutting the allowance narrower, for example around a collar, so it turns smoothly.
- Grading: trimming the layers of an enclosed seam to different widths, so they do not stack into a ridge.
- Clipping: snipping into the allowance on inward curves, so it can spread.
- Notching: cutting small wedges from the allowance on outward curves, so it does not bunch.
- Corners: trimming diagonally across the allowance at a corner before turning it out.
Never trim allowances that will be finished separately or that you may need for fitting later. For finishing the raw edges that remain, see seam finishes.
Converting Common Allowances
| Inches | Millimeters (approx.) |
|---|---|
| 1/4 | 6 |
| 3/8 | 10 |
| 1/2 | 13 |
| 5/8 | 16 (patterns usually round to 15) |
| 1 | 25 |
Seam allowance is one of the abbreviations every pattern uses; for the rest, see sewing abbreviations. For the seams themselves, see types of seams.
Sources
- Seam (sewing), Wikipedia
- Pattern (sewing), Wikipedia
Frequently Asked Questions
What is the standard seam allowance?
It depends on the pattern. Many traditional commercial garment patterns use 5/8 inch (1.5 cm), many European and independent patterns use 1 cm (about 3/8 inch), home décor often uses 1/2 inch, and quilting uses 1/4 inch. Always check the pattern instructions.
Why is seam allowance 5/8 inch?
A 5/8 inch allowance gives room to adjust the fit, to finish edges and to sew curves and corners, and it became standard on many American commercial patterns. Many newer patterns use narrower allowances to reduce trimming.
Do patterns include seam allowance?
Most commercial and independent patterns include it, and say so on the pattern or instructions. Some, especially many European magazine patterns and some vintage patterns, do not, and you must add it when cutting.
How do I keep my seam allowance consistent?
Use the engraved guide lines on your machine's needle plate, a magnetic or adhesive seam guide, or a presser foot with a built-in guide, such as a quarter-inch foot for quilting. Watch the guide, not the needle, as you sew.
Keep Reading
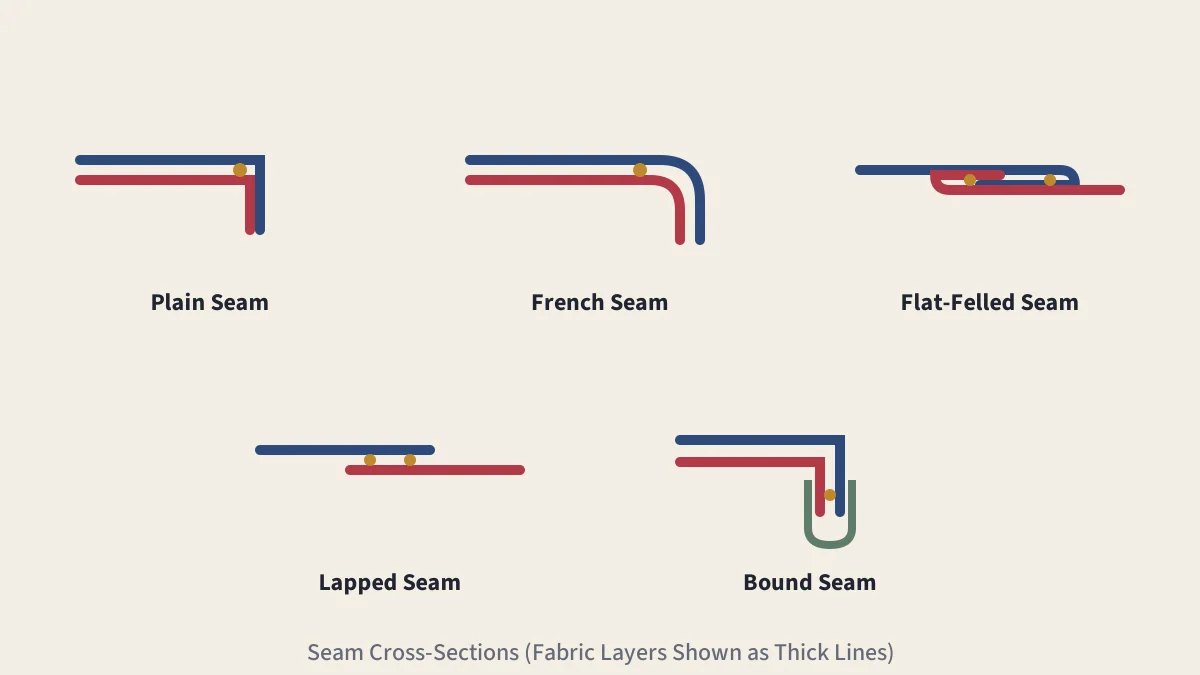
Types of Seams
Plain, French, flat-felled, lapped, bound and other seams compared.
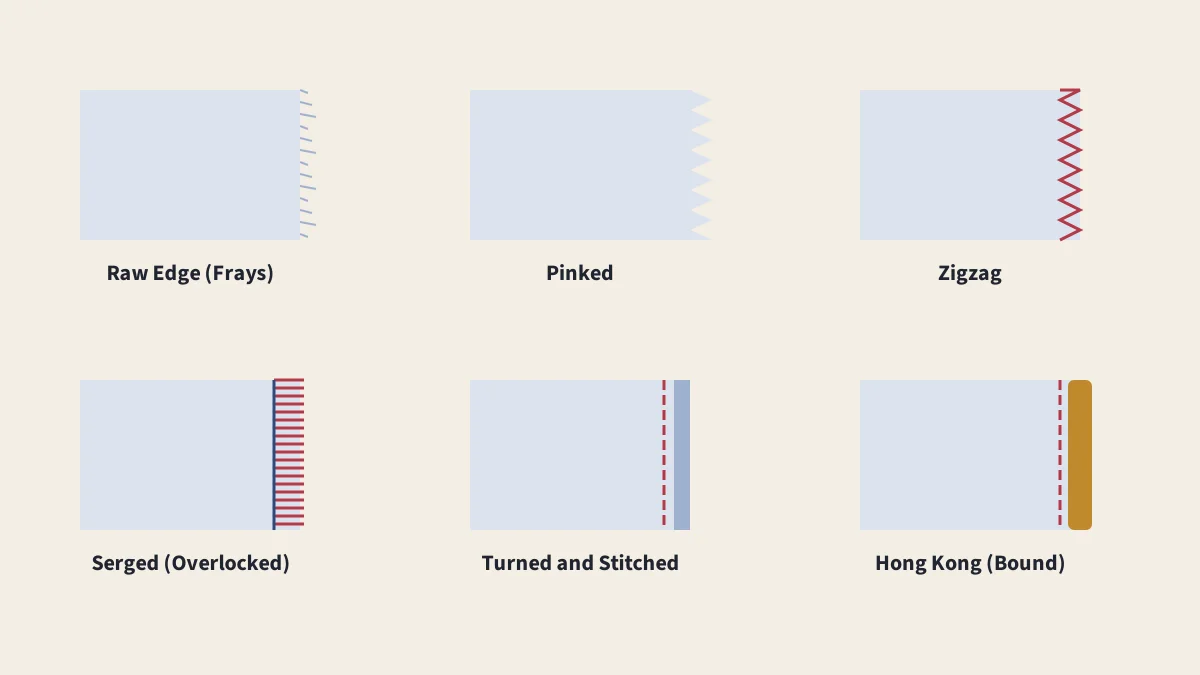
Seam Finishes
Pinked, zigzag, serged, Hong Kong, bound and enclosed finishes.
Sewing Abbreviations
RST, WOF, SA, FBA, HST, UFO and dozens more explained.
Presser Feet Guide
What each presser foot does and how to check it fits your machine.