Pressing as You Sew: The Habit That Makes Sewing Look Professional (2026)
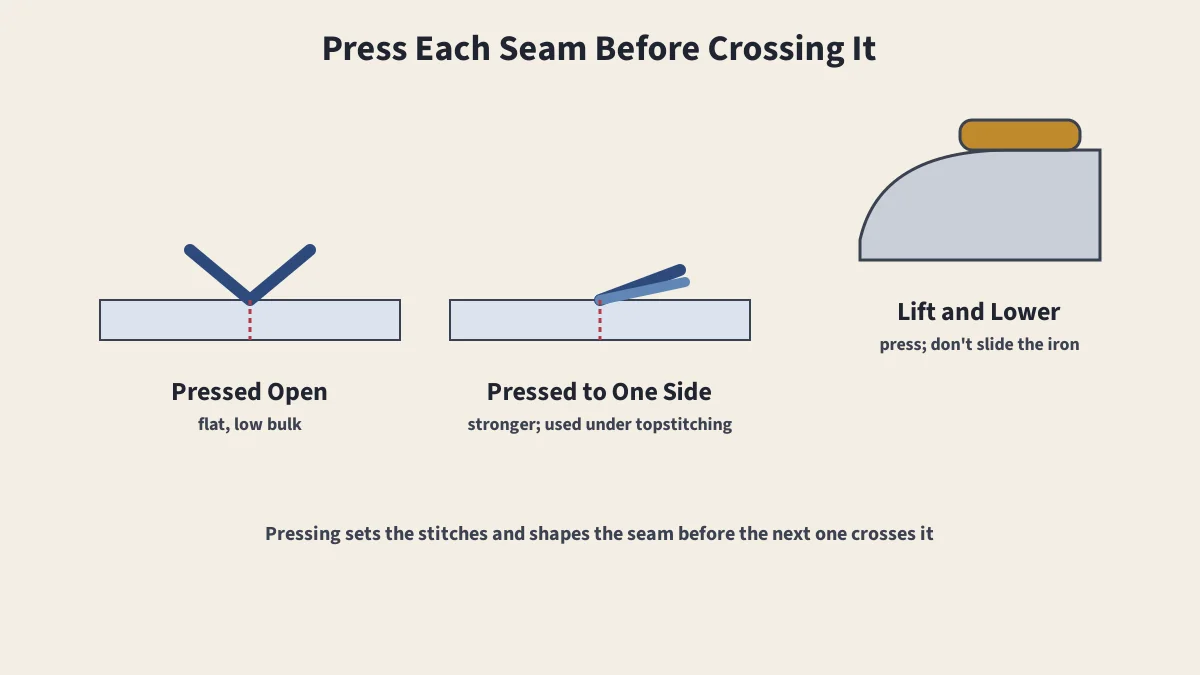
Pressing each seam as you go is one of the simplest ways to make home sewing look professional. It sets the stitches, flattens the seam and shapes the fabric before the next seam locks it in place.
In This Article
Pressing in Brief
- Press, don't iron: lift and lower, don't slide
- Every seam: press before another seam crosses it
- Order: flat as sewn, then open or to one side
- Curves: over a tailor's ham
- Protect: press cloth and the right heat
Ironing removes wrinkles from finished clothes. Pressing is a sewing technique: the iron is lifted and lowered onto one area at a time, with steam and pressure, to shape fabric and seams. Done between steps, it makes the finished piece look crisper than pressing everything at the end ever can.
The Basic Sequence
- Press the seam flat as it was sewn, to set the stitches.
- Open the seam or move both allowances to one side, and press from the wrong side.
- Press lightly from the right side, using a press cloth if needed.
- Let the fabric cool before moving it, so the shape sets.
Open or to One Side?
| Press | When |
|---|---|
| Open | Most garment seams; flattest finish; plain seams in wovens |
| To one side | French and flat-felled seams, topstitched seams, armholes, patchwork, overlocked seams |
| Toward the darker fabric | Patchwork, so the dark allowance doesn't show through light fabric |
See types of seams and seam finishes.
Pressing Shaped Areas
- Curved seams and darts: press over a tailor's ham so the shape is kept.
- Darts: press vertical darts toward the center and horizontal darts downward, unless the pattern says otherwise.
- Sleeves and narrow tubes: use a sleeve board or seam roll, which also stops allowances leaving ridges.
- Points and corners: press over a point presser before turning.
For the tools, see pressing tools.
Heat, Steam and Protection
- Match the temperature to the fiber; see ironing temperatures by fabric.
- Use a press cloth on wool, dark fabrics, synthetics and fusibles, to avoid shine and scorching.
- Use a clapper on wool: press with steam, then hold the wooden clapper on the area to trap the heat and flatten the seam.
- Press napped fabrics such as velvet face down on a needle board or a fluffy towel; see pile fabrics.
Sources
- Ironing, Wikipedia
- Clothes iron, Wikipedia
- Tailor's ham, Wikipedia
Frequently Asked Questions
What is the difference between pressing and ironing?
Ironing slides the iron back and forth to remove wrinkles. Pressing lifts and lowers the iron onto one area at a time, so seams and shapes are set without stretching the fabric.
Should seams be pressed open or to one side?
Pressing open gives the flattest result and is standard for most garment seams. Pressing to one side is stronger and is used where seams are topstitched, enclosed, or in patchwork, where pressing toward the darker fabric hides it.
Why press a seam flat first?
Pressing the seam flat as sewn, before opening it, sets the stitches into the fabric, which helps the seam lie smoothly afterward.
How do I avoid shine when pressing?
Press from the wrong side where possible, use a press cloth on dark fabrics, wool and synthetics, and use the correct temperature for the fiber.
Keep Reading
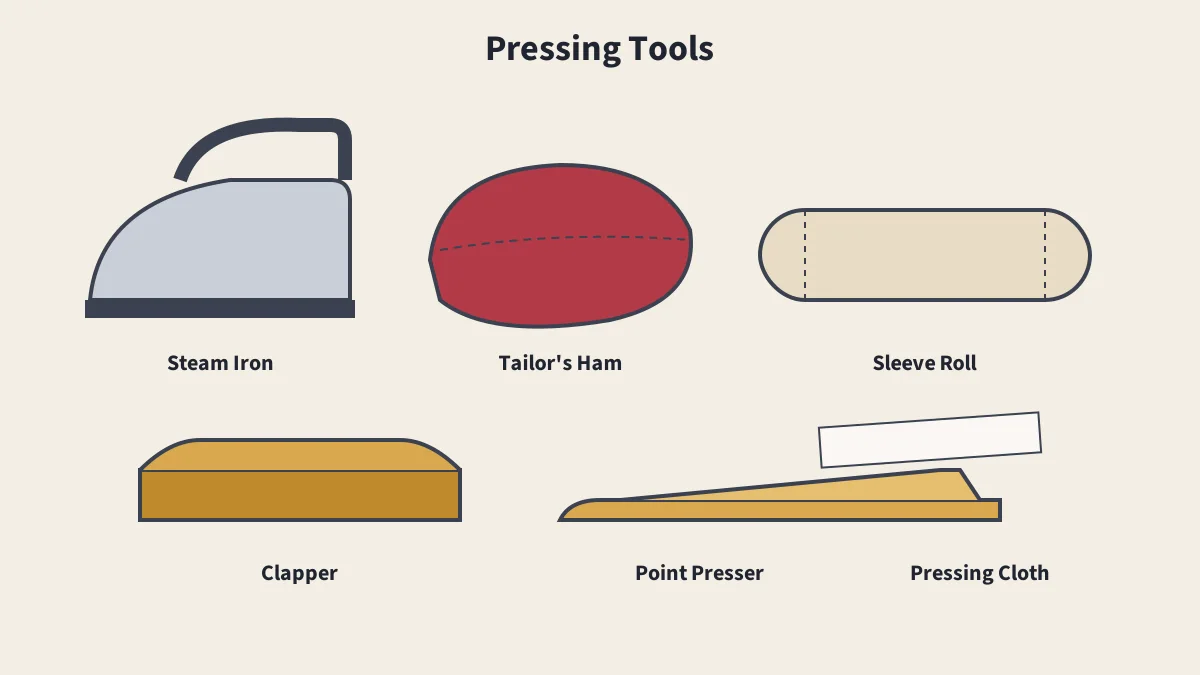
Pressing Tools
The iron, tailor's ham, sleeve roll, clapper and pressing cloth.
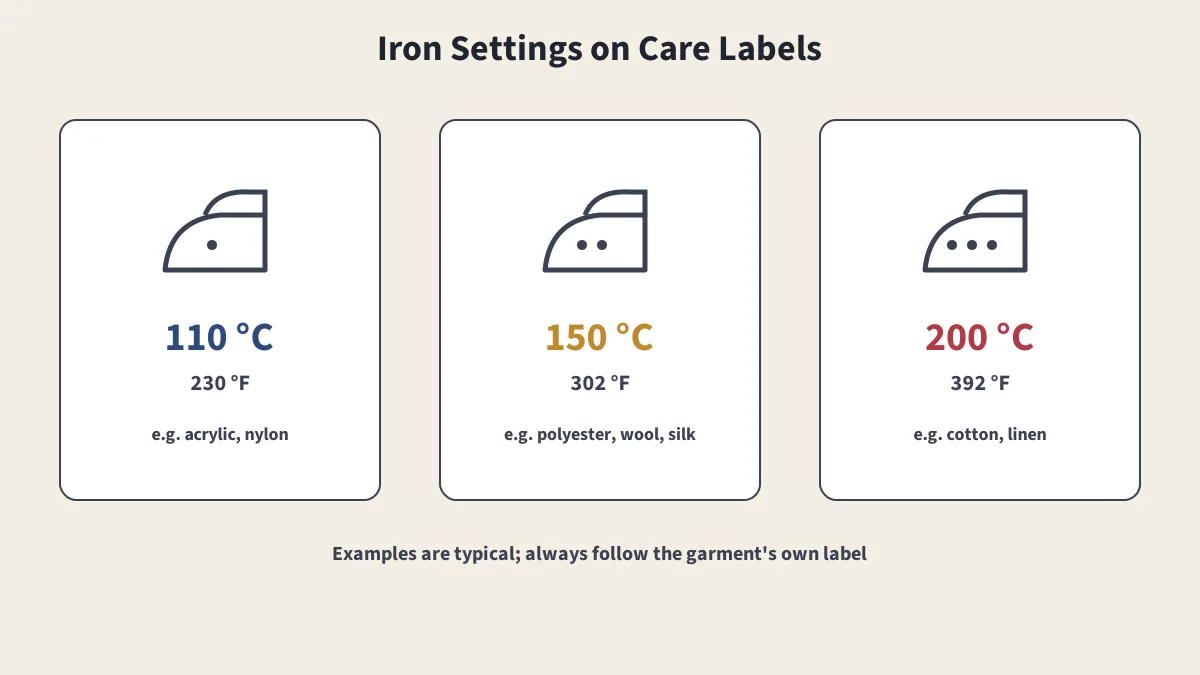
Ironing Temperatures
What iron dots mean and the right heat for common fabrics.
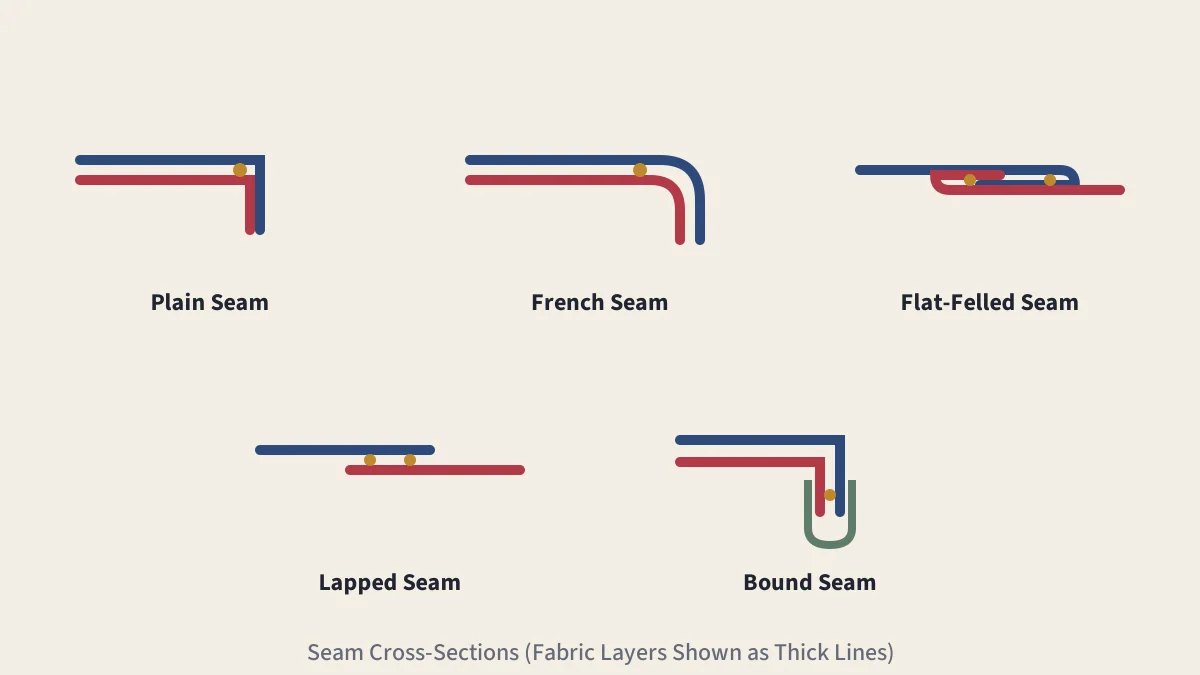
Types of Seams
Plain, French, flat-felled, lapped, bound and other seams compared.
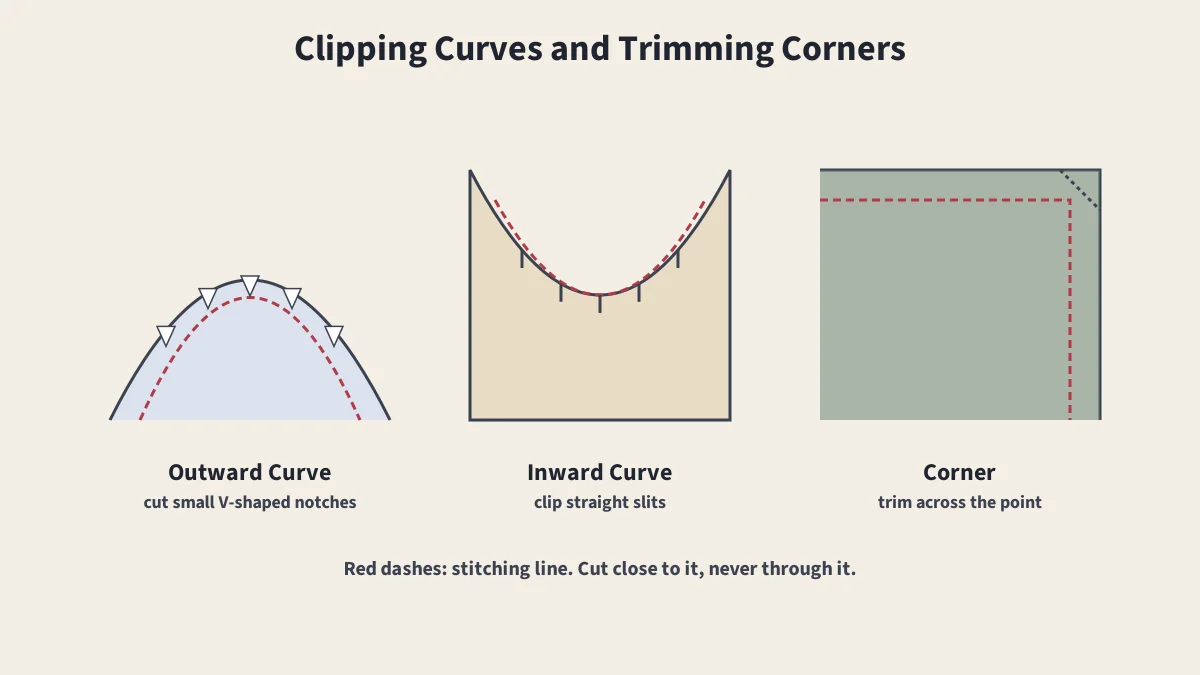
Sewing Curves and Corners
Pivoting, clipping, notching and grading for crisp results.